
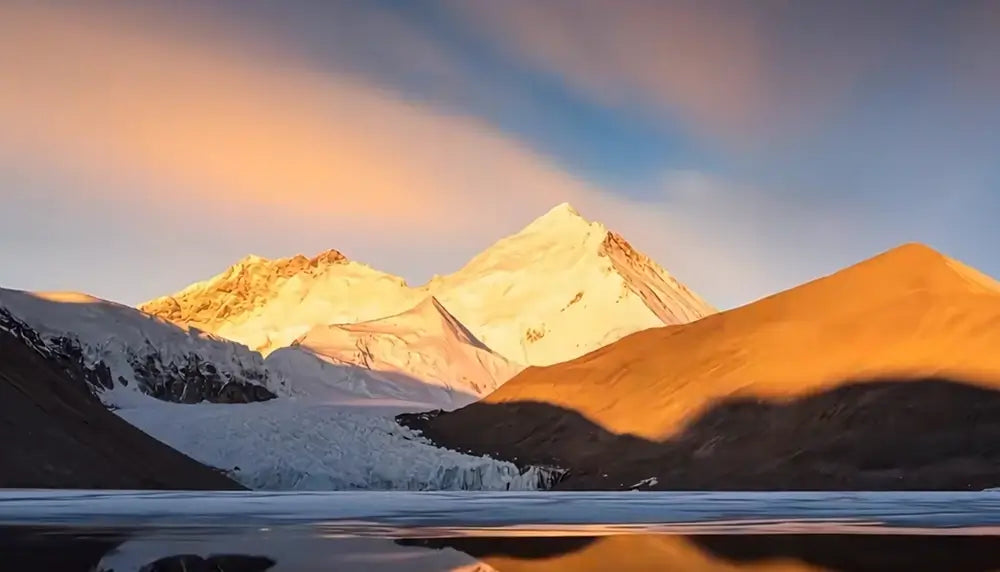
Most people start the Everest Base Camp trek dreaming of one photo: Mount Everest. But once you are on the trail, you quickly realise the story is much wider than the summit. The stone streets of Namche Bazaar, the morning light over Ama Dablam, the quiet teahouses, the prayer flags, the glacial moraine near Gorak Shep and the tired faces at the end of a long day all deserve attention.
Good Everest Base Camp photography does not require the most expensive camera. A phone can do a fine job. What matters more is timing, patience, battery care and knowing when photography should step aside for safety.
Best Photo Spots on the Everest Base Camp Trek
Lukla to Phakding: The Beginning of the Story
The first day is not the most dramatic in mountain terms, but it is full of atmosphere. Lukla airport, stone paths, suspension bridges, prayer wheels, porters, mules and village life all help tell the story of the trek.
Do not save your camera only for snowy peaks. Some of the best EBC trek photos are about movement, people and small details.
Namche Bazaar: The Mountain Town
Namche Bazaar is one of the most photogenic places on the route. Built into a natural amphitheatre, it offers colourful rooftops, mountain backdrops and a strong sense of place.
From viewpoints above the town, you can capture layers of village, valley and distant peaks. In clear weather, this area may offer early views towards Everest, Lhotse and Ama Dablam.
Tengboche: Monastery and Ama Dablam
Tengboche is a favourite stop for many photographers. The monastery, open ground and Ama Dablam backdrop create a classic Himalayan scene. Morning and late afternoon light are especially good.
Be respectful around religious spaces. Check whether photography is allowed before taking pictures inside or near ceremonies.
Dingboche: Wide Valleys and High-Altitude Life
Dingboche has a spacious, open feel. It is a good place for landscape shots, portraits and images of village life at altitude. Since many itineraries include an acclimatisation day here, you may have more time to slow down and shoot properly.
Lobuche to Gorak Shep: Rough Himalayan Texture
This section feels colder, harsher and more remote. The landscape becomes rockier and more glacial. It may not be pretty in a postcard sense, but it photographs beautifully if you like honest mountain texture.
Watch your footing. Loose rock, ice and tired legs are not a good mix when chasing a photo angle.
Kala Patthar: The Classic Everest View
Kala Patthar is one of the most popular viewpoints for photographing Everest. Many trekkers go early in the morning or around sunset for better light and mountain contrast.
It is also high, cold and windy. Put on warm layers before you start shooting. A great image is not worth numb hands or altitude trouble.
Is a Phone Enough for EBC Photography?
For most trekkers, yes. Modern phones are excellent for daylight landscapes, video clips, portraits and quick travel documentation. They are light, easy to carry and simple to use.
Phone photography works well for:
- Trail moments
- Teahouse life
- Short videos
- Social media
- Blog images
- Quick portraits
The limits are battery life, low-light quality, zoom range and high-contrast mountain scenes. If your goal is personal memories, a phone is enough. If you want higher-quality landscape images, a lightweight camera may be worth carrying.
Camera Gear for the Everest Base Camp Trek
Lightweight Mirrorless Camera
A small mirrorless camera with one versatile zoom lens is a good balance. Something around a 24-70mm or 24-105mm equivalent range can cover landscapes, portraits, villages and details.
Try not to overpack lenses. A long telephoto can compress mountain layers beautifully, but the weight becomes more noticeable with every metre of altitude.
Do You Need a Tripod?
A tripod is useful for stars, timelapse, sunrise, sunset and long exposure work. But it is not essential for most trekkers.
If you bring one, choose a compact lightweight model and be honest with yourself. Will you actually use it after walking six hours at altitude? If not, leave it behind.
Action Cameras
An action camera is useful for suspension bridges, walking clips, weather changes and first-person footage. It will not replace a main camera for distant mountain detail, but it adds energy to your travel record.
High-Altitude Photography Problems
Batteries Drain Faster in the Cold
Cold weather can reduce phone and camera battery performance quickly, especially above Dingboche. Keep spare batteries close to your body, not in an outer pocket.
Practical tips:
- Carry spare camera batteries
- Keep batteries in an inner pocket
- Put your phone in your sleeping bag at night
- Use airplane mode when possible
- Bring a reliable power bank
- Turn the camera off between shots
Charging is usually available in teahouses for a fee, but it should not be your only plan.
Lens Fogging and Condensation
Moving from a warm dining room into cold air can fog your lens. The reverse can also create condensation. Let your camera adjust gradually inside its bag before exposing it to a sharp temperature change.
This small habit helps protect your equipment and keeps your lens clearer.
Cold Hands Make Shooting Harder
Thin liner gloves are very useful. Wear them under warmer gloves so you can operate your camera without exposing bare skin for too long.
If your fingers are getting numb, stop shooting and warm up. The mountain will still be there in five minutes.
How to Take More Natural Trekking Photos
Many trekking photos look stiff because someone simply stands in front of a mountain. More natural images often come from action and small moments.
Try photographing:
- A walker crossing a bridge
- Someone drinking tea in a teahouse
- Boots by the door
- A guide checking the trail
- Prayer flags moving in the wind
- A tired pause on the uphill
- Packing a bag in the morning
- Steam rising from a bowl of soup
These photos carry memory. Years later, they often mean more than the perfect summit pose.
Photography Safety on the EBC Trail
Never let a photo become more important than your footing, health or route timing.
Keep these rules in mind:
- Do not step far off the trail for a photo
- Do not block yaks, mules or porters
- Do not stop too long on suspension bridges
- Avoid risky cliff-edge selfies
- Listen to your guide
- Put the camera away if altitude symptoms appear
- Arrive at your teahouse before dark
The Himalayas are large enough. You do not need to stand somewhere dangerous to make them look dramatic.
Backing Up Your Photos
Losing photos from the Everest Base Camp trek would hurt. Make a simple backup routine.
Good habits include:
- Carry extra memory cards
- Avoid formatting cards too early
- Back up key photos to your phone
- Use cloud backup when WiFi allows
- Keep camera cards separate from the camera
- Record important videos in shorter clips
If you are creating blog content, YouTube videos or SEO articles, backup matters even more. Real images from the trail can make your content more useful and trustworthy.
Final Thoughts
The best Everest Base Camp trek photography comes from attention, not just equipment. Morning light on a stone wall, a quiet cup of tea, a line of prayer flags, a tired smile at Gorak Shep, the first glimpse of Everest from the trail - these are the moments that make the journey feel real.
Bring gear you can manage, protect your batteries, respect local people and never trade safety for a shot. A good photo should help you remember the trek, not become the reason the trek goes wrong.
Years later, the most valuable image may not be the sharpest one. It may simply be the one that brings back the cold air, the slow steps and the feeling that you were truly there.

Leave a comment
All comments are moderated before being published.
This site is protected by hCaptcha and the hCaptcha Privacy Policy and Terms of Service apply.